(Page in Development)
New Unity input system
Importing the DigiClap SDK Package
- Open your Unity project.
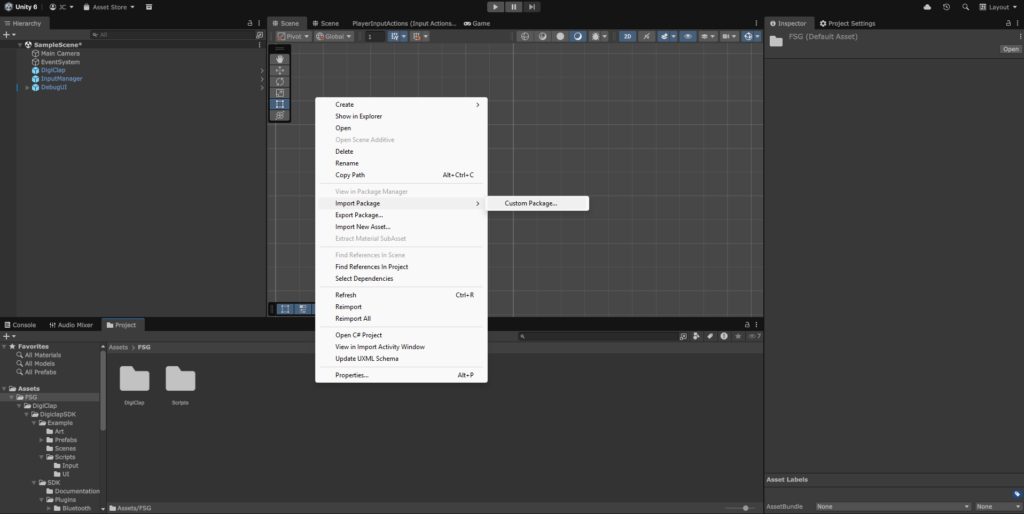
- In the Project window, right-click anywhere inside the Assets area.
- From the context menu, select Import Package → Custom Package…
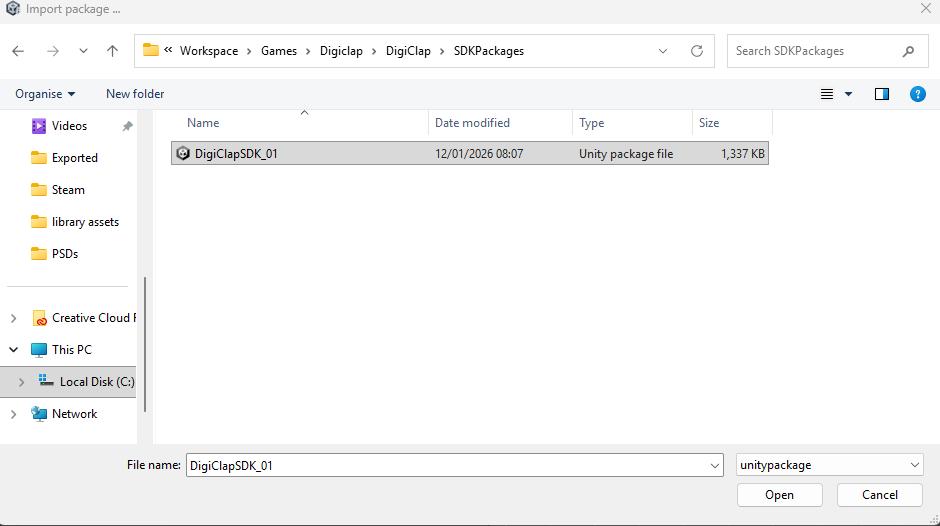
- In the file browser, locate and select the DigiClapSDK .unitypackage file.
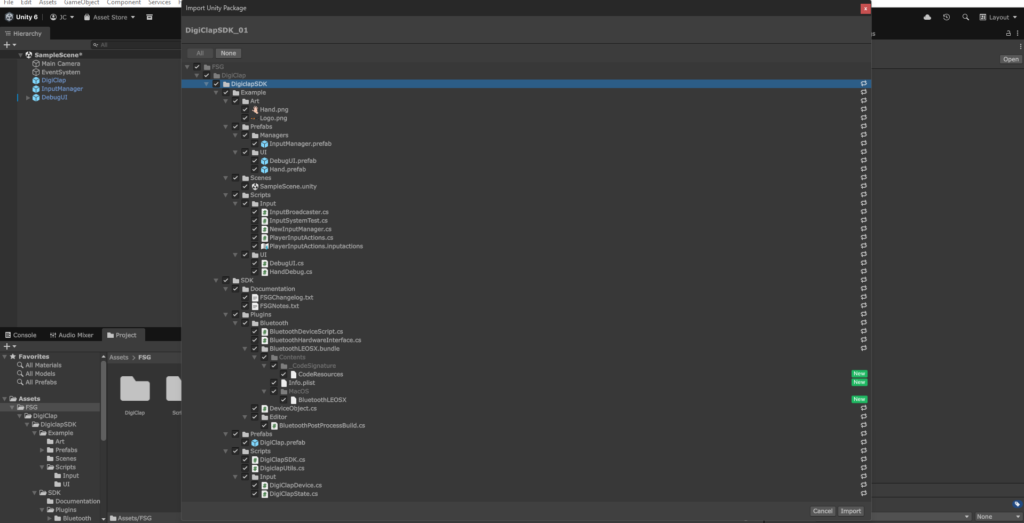
- The Import Unity Package window will appear, displaying all files included in the SDK:
- Core SDK files are required.
- The Example folder is optional and may be imported only if you want the sample scenes, prefabs, and scripts to help you get started.
- Click Import to complete the installation.
Adding the DigiClap Manager Prefab
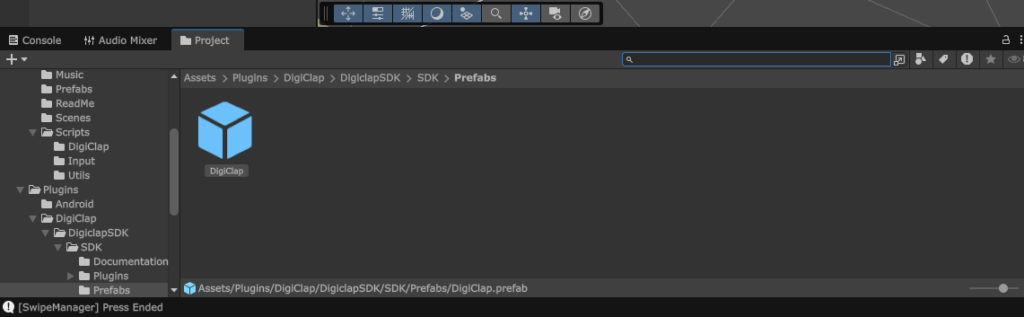
To enable DigiClap device detection and gesture input, the DigiClap manager prefab must be added to the scene.
- In the Project window, navigate to: DigiClap/DigiclapSDK/SDK/Prefabs
- Locate the DigiClap.prefab
- Drag and drop the prefab into your active scene hierarchy.
Configuring Controls Using Unity’s New Input System
- Open your project’s existing Input Actions asset, or create a new Input Actions asset if one has not already been configured.
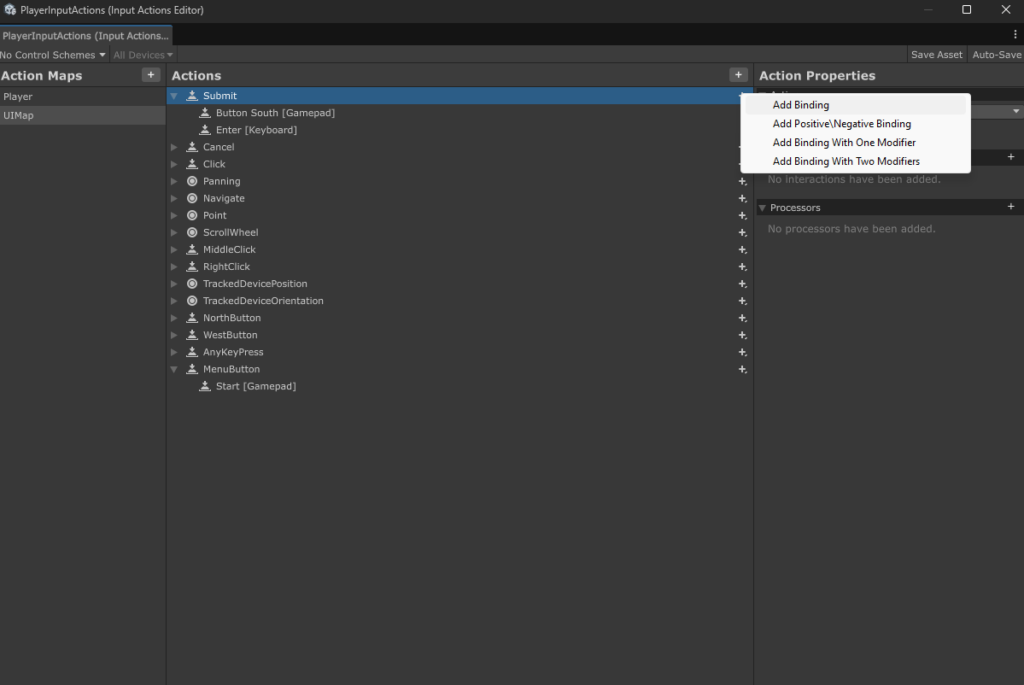
- Create or select an Action Map.
- Add or select an Action you want to trigger using DigiClap.
- To Bind an Action to a DigiClap Gesture
- Click the + button and click on Add Binding .
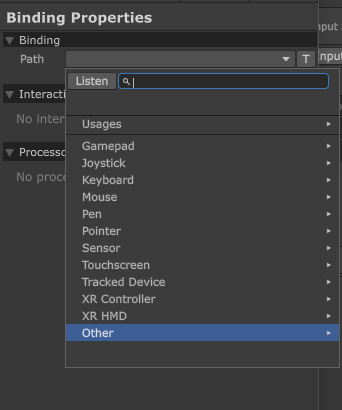
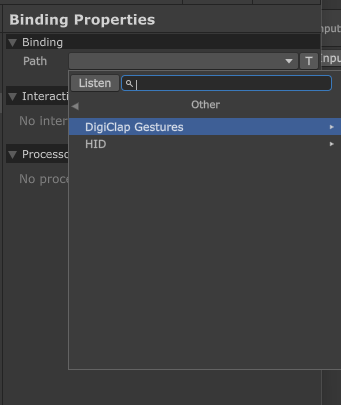
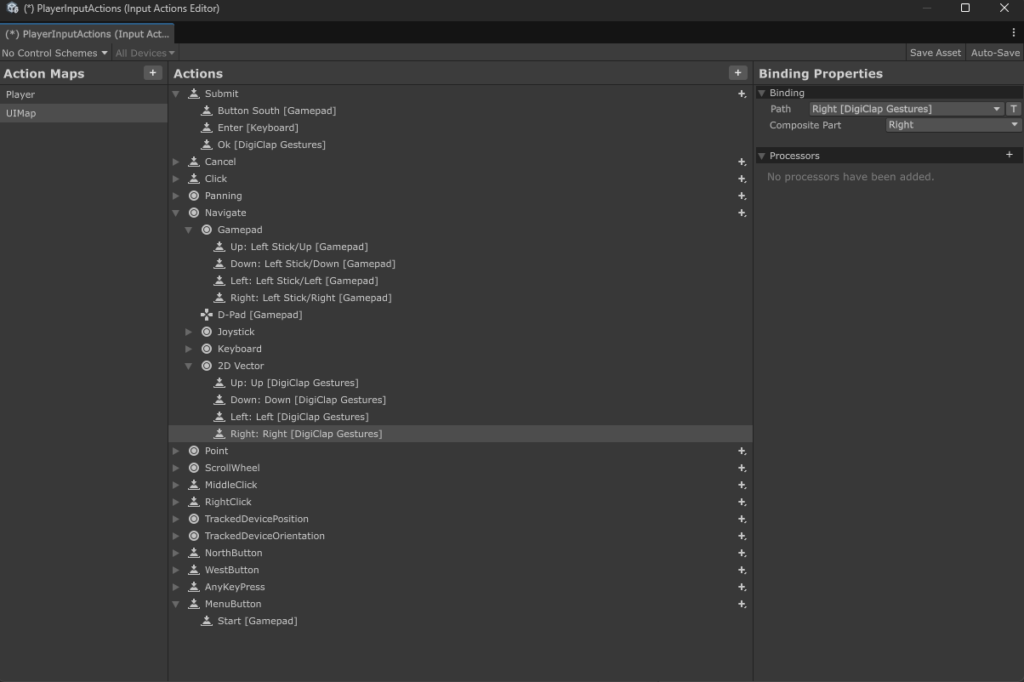
- In the Binding Path selector, navigate to Other > DigiClap Gestures
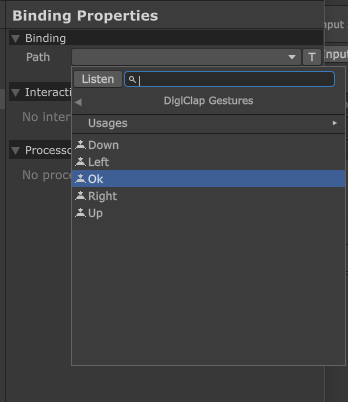
- Choose the desired gesture.
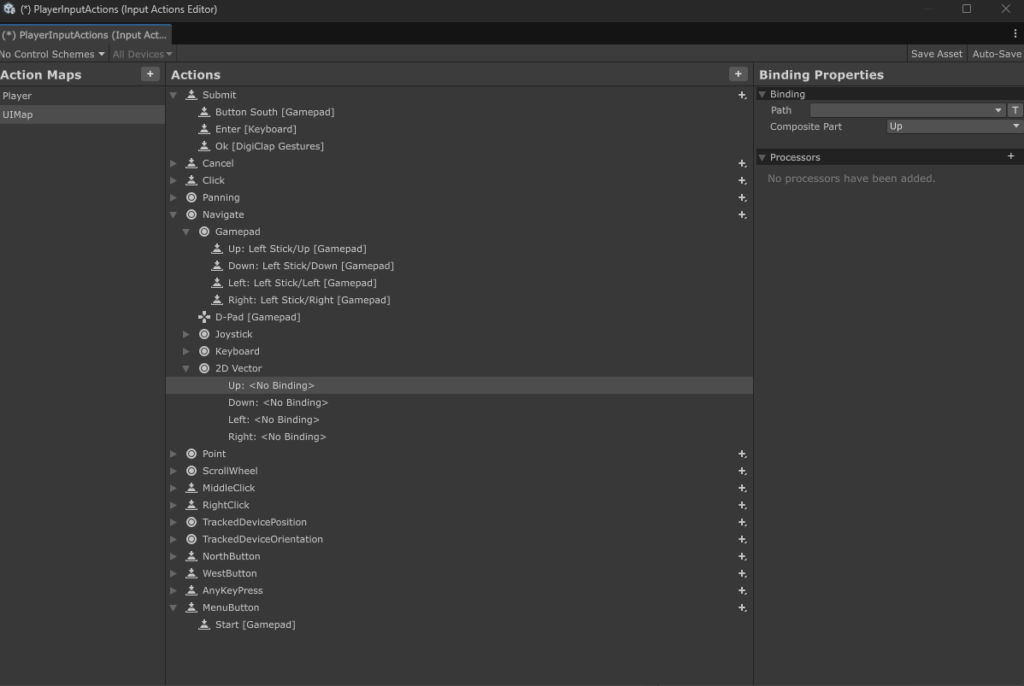
- To Use DigiClap with Composite Bindings:
- Click the + button and click on Add Up/Down/Left/Right Composite
- Click the + button and click on Add Up/Down/Left/Right Composite
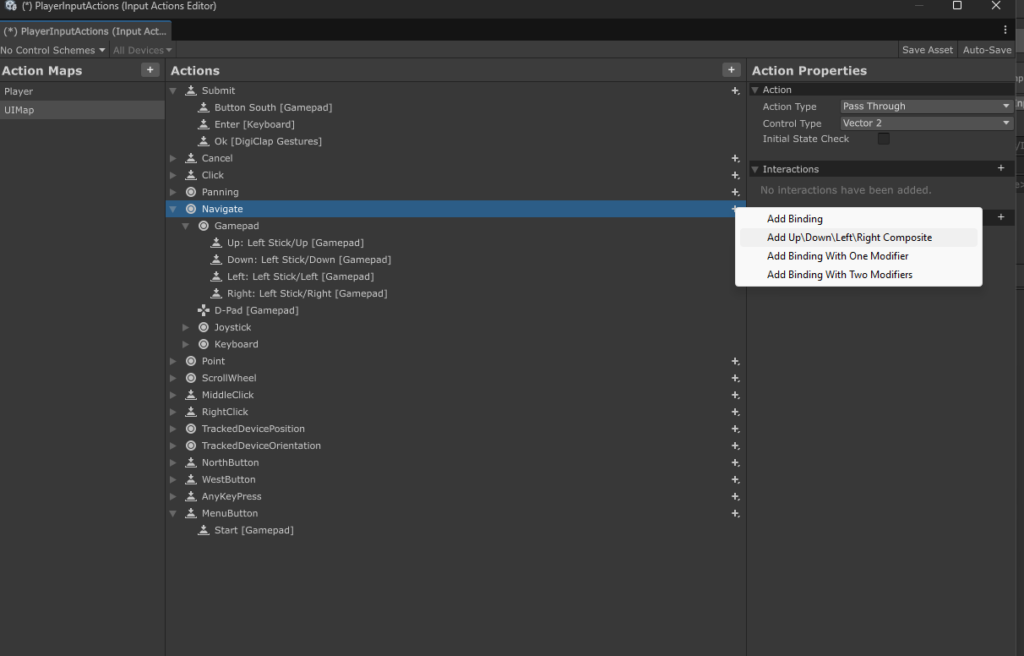
- Assign each direction by doing steps 4.2 – 4.3
- Save the Input Actions asset.
DigiClap Gestures Overview
DigiClap exposes gestures as input bindings that can be mapped to actions:
| Gesture | Description |
| Up | Upward gesture |
| Down | Downward gesture |
| Left | Leftward gesture |
| Right | Rightward gesture |
| OK | Confirm / selection gesture |